

Cover Image: Canva and Photoshop logos (TM).
It’s all about branding
Ever since Medium announced the beta of the new writer profile page, I knew that more emphasis would be put on the writers. With the new system, you can design your page to be any style you want. This allows writers to express themselves like never before.
But what about if a writer stumbles upon your stories outside of your profile page? They wouldn’t get to see your unique style, unless you self-publish, which is not a great option for writers who are just starting out.
The new changes help you create your branding within the platform. And one way to stand out above the rest to create a consistent branding in your featured images.
That’s exactly the reason why I started creating images for each article I write. Everyone uses stock images as their leading image. It’s not remarkable. If you scroll through a page with hundreds of stories, yours won’t stand out if you also use stock photography.
I noticed a few profiles were standing out, and I wanted to be among them. For good examples, check out Nate Miller, John P. Weiss, Darius Foroux, Scott H. Young, and Amardeep Parmar, just to name a few.
Get inspired by these styles and my process to create your style.
How to Create a Custom Image for All Your Stories
Choose a Base Colour
For my style, I chose to lead with a colour that’s not overused and just so happens to be my favourite one: orange. When you scroll through hundreds of stories, orange is very effective at standing out.
My orange gradient is the same for every image I create. I encourage you to find your base colour and keep using it for each image you make.
Alternatively, you can follow Amardeep Parmar’s lead and customize that colour based on the publication your piece gets published in.
If you’re unsure of what colour to use, be sure to check out Neil Patel’s article: The Psychology of Color: How to Use Colors to Increase Conversion Rate. This image, taken from his article, can guide you.
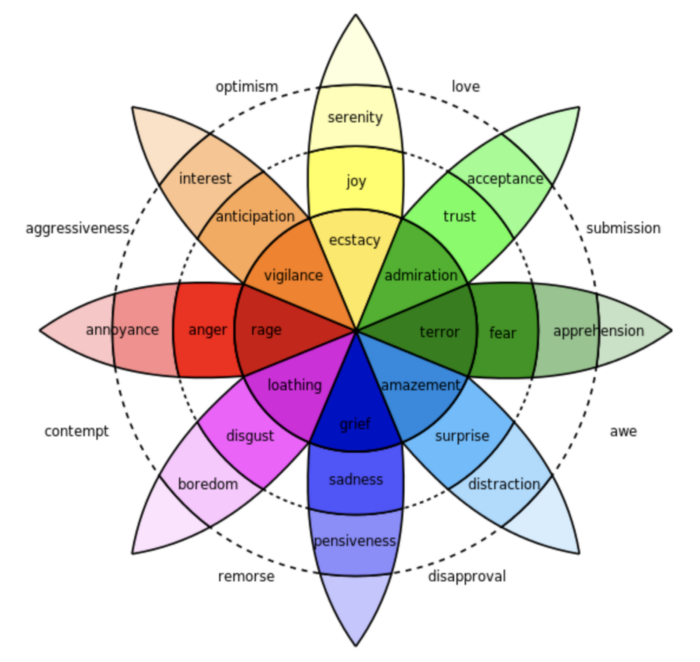
Robert Plutchik’s wheel of emotions
Choose a Leading Image
As a professional photographer, nothing annoys me more than a photo that has multiple subjects. A good photo only has one.
Based on my research on the top articles, these types of leading images work best, in no particular order.
Photos of women
Photos of non-white people
Photos of famous people
Photos of a person looking slightly to the side
Photos of a person or people from the back
Custom illustrations
You can find free photos on Unsplash, Pexels, and Pixabay, just to name a few. For more professional photos, you can use Adobe Stock or Getty Images. For illustrations, you can use VectorStock or Behance.
Make It Unique
Here are some of mine from recent articles.


Can you tell me the patterns I’m using?
They all use the same orange gradient.
They all feature one very clear subject (on the foreground) taken out of the background.
The foreground image always has the same outer glow.
There’s an enlarged, faded out background of the original image between the gradient and subject image (giving the shadow effect).
These four things are what make my images unique.
Let’s look at other unique examples from other writers.
Darius Foroux, Six Spokes Theory: Strategy For An Optimal Life

Uniqueness: Signature, background colour, sketch-style images, simplicity, centred.

Uniqueness: Light-blue colour, cartoon, single subject, style.

Uniqueness: Black & white, detailed cartoon, speech bubble, signature, style.
If you scroll through hundreds of articles, you’d know for sure that these are from Foroux, Miller, and Weiss.
Extracting a Background Image Effortlessly
Thanks to Canva’s background remover technology, you can effortlessly remove backgrounds from any photo in a single click.

The background remover option.
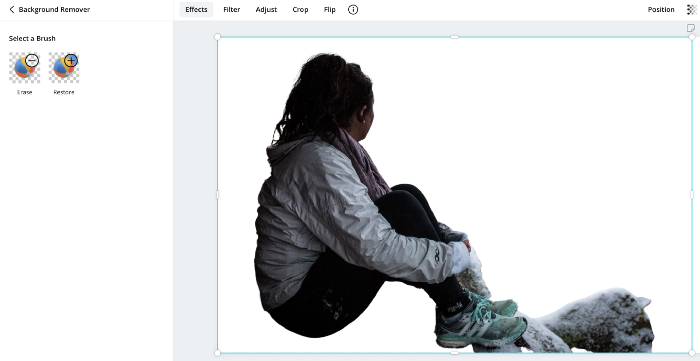
After a single click.
If you want to keep some parts of the background Canva removed, you can use the Restore functionality in the top-left corner. For example, let’s add the rock back.

Rock painted back using the Restore brush.
Making Adjustments to the Subject
If you find your subject isn’t standing out enough, you can adjust the brightness, contrast, and more.
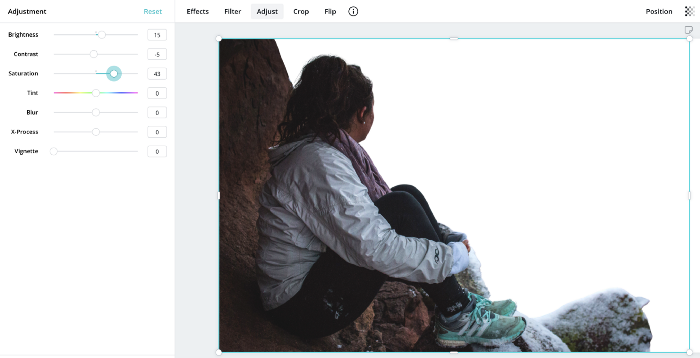
With brightness and colours adjusted to make the subject stand out more.
Getting Creative With Filters and Effects
I don’t usually use filters, but they have interesting options. Here’s an example from my early days creating my custom images.

I used a coloured filter and a glitch effect. Here’s where you find the effects, along with another example.

Using the base Trace glitch effect on the photo from earlier.
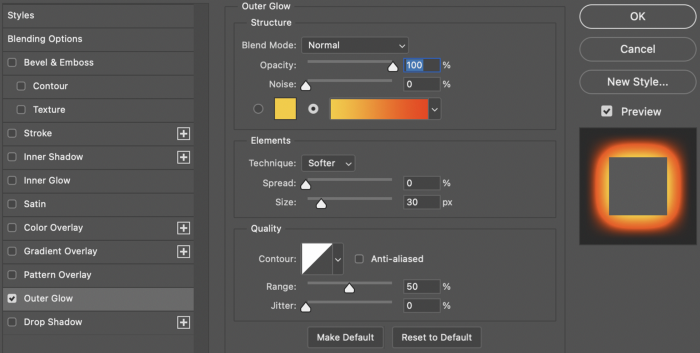
Finalizing in Photoshop
I finish everything on Photoshop after, where I use a template that always has the same background gradient and outer glow setting. It looks like this.

There are usually only three layers and only the background and foreground layers change.
Background Layer
This is the original image I got from any of the sources I mentioned above. I expand it to be about 10% bigger than the canvas and I set the opacity to 15%. I never change these rules. This gives it the little shadow effect you see around the subject or foreground image.
Foreground Layer
This is the image I created from Canva. I simply paste it in and apply the same outer glow I use for every other image. This is what it looks like.
And voila! I’ve got myself a custom image that’s unique to my style.
Conclusion
I’m sharing all my knowledge so you can create your own unique style. Please don’t steal someone else’s style in hopes to get extra clicks and bait readers to think it’s from another writer.
Finding your own unique style will take a few iterations. My first image was bad. But now I’m satisfied and get good comments about them.
Try it out, have fun, and be unique. You can do this!